Device Specific Notes
Raspberry Pi
A Raspberry Pi is suitable for running Tronbyt, as long as it has sufficient RAM. See the installation walkthrough video. Check which device you have on the Raspberry Pi product series page and ensure you have more than 512MB of memory, such as 1GB. 512MB may be suitable with some additional configuration. A 64-bit OS is highly recommended.
Deploying Tronbyt Manager to a Raspberry Pi
Basic setup
If you are starting fresh, use the Raspberry Pi Imager to install Raspberry Pi OS (64-bit) onto an SD card. Be sure to apply OS customization settings to allow your Pi to connect to WiFi, and note the hostname, username and password set.
After putting the SD card into the Pi and booting it, you can connect to the Pi remotely via SSH. In Windows 10/11, macOS and Linux, this functionality is built in. Otherwise, you will need to install 3rd party software like PuTTY. Open a command prompt and type:
followed by the password, where username, hostname and the password are all the items you configured during the Pi setup.
Automatic install script
Manual installation
On your Pi, type or copy/paste the following commands:
This will check for and install updates for existing packages.
This will install Docker using the official Docker script.
Replace your_username with the username being used on the Pi before running:
This will allow you to run Docker commands without re-entering your password every time.
This is an optional but recommended step.
If you run it, log out (type exit) and log back in.
Test the install by running:
If you see a message indicating Docker is up and running, you can follow the instructions on the Server README.
Tronbyt Devices
You can obtain a Tronbyt device in order to display images from the Tronbyt server.
Using the WiFi config portal
The firmware has a rudimentary WiFi config portal page that can be accessed by joining the TRONBYT-CONFIG network and navigating to http://10.10.0.1.
WiFi Config Portal How-To Video
Tidbyt Gen 1 Devices
Troubleshooting
Error when trying to flash new firmware
If you are trying to flash new firmware to your Tidbyt Gen1 device and the flashing console shows an error like one of the following:
Unexpected error: ESP is not in flash boot mode. If your board has a flashing pin, try again while keeping it pressed.
Failed to connect to Espressif device: Wrong boot mode detected (0x13)! The chip needs to be in download mode.
This is a known issue with some Tidbyts, possibly due to 'factory second' status.
There are two possible resolutions:
- Use a USB-A to USB-C cable instead of a USB-C to USB-C cable, especially through a USB hub. Also try using a different USB cable or different ports on your PC.
-
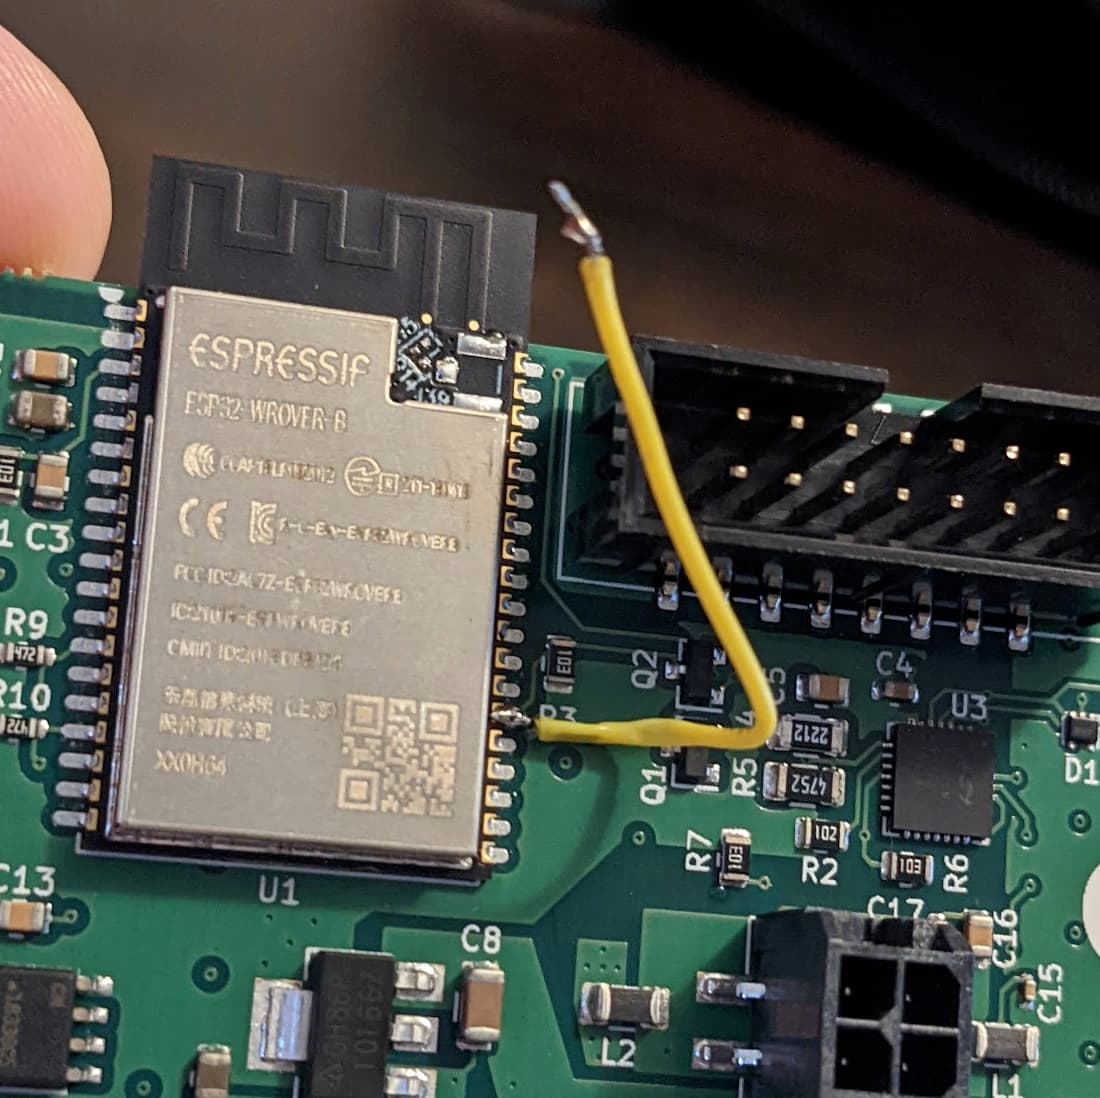
You can also open the Tidbyt and use tweezers to ground the pin on the chip indicated here:
Kubernetes
Liveness Probe
You can configure a liveness probe for Kubernetes by sending an HTTP request to /health: